
Upgrading vehicle lighting is one of the most misunderstood parts of building a capable truck or overland rig.
Most people start with the same assumption: brighter equals better.
So they chase lumen numbers, bolt on a light bar, and assume visibility is solved.
But real-world lighting performance is not about raw brightness. It’s about how light is measured, how it behaves in different conditions, and how well the system is designed for actual driving environments.
This guide breaks down how vehicle lighting really works — including lumens vs candela, amber vs white light, driving vs fog setups, mounting strategy, and why wiring and installation quality matter just as much as the lights themselves.
Understanding Vehicle Light Output: Lumens vs Candela
One of the biggest misconceptions in off-road lighting is how brightness is measured.
Lumens (Total Light Output)
Lumens measure the total amount of light a source produces (at distance).
It tells you how “bright” a light is in total output, but not how that light is directed or used.
A high-lumen light can still perform poorly if the beam is unfocused or poorly designed.
Candela (Focused Intensity)
Candela measures how much light is projected in a specific direction.
This is what actually determines:
- How far you can see down a trail
- How well you can identify obstacles at speed
- How usable the light is in real driving conditions
In practical use:
- Lumens = quantity of light
- Candela = usable distance and intensity
A well-designed lower-lumen system with strong candela will often outperform a high-lumen floodlight setup.
Why More Light Can Actually Make Visibility Worse
More output is not always better in real-world environments.
In dust, snow, fog, or rain, excessive uncontrolled light creates:
- Backscatter (light reflecting off particles in the air)
- Reduced contrast on terrain
- Increased eye fatigue over long drives
- Loss of depth perception at speed
This is why properly designed beam patterns matter more than raw output numbers.
Lighting is not just about illumination — it’s about control.
Amber vs White Light: Eye Fatigue and Real-World Conditions
Light color temperature has a direct impact on visibility and driver fatigue.
White Light (Cool Temperature, ~5000K–6500K)
White light is common in modern LED systems.
Advantages:
- Higher perceived brightness
- Better color definition
- Strong long-distance visibility in clear conditions
Limitations:
- More glare in dust, fog, and snow
- Higher eye strain over long night drives
- More reflection off airborne particles
Amber Light (Yellow/Selective Amber)
Amber light behaves differently in atmospheric conditions.
Advantages:
- Reduced glare in dust, fog, and snow
- Better contrast in low-visibility environments
- Significantly lower eye fatigue on long drives
Limitations:
- Slight reduction in perceived sharpness
- Less effective for maximum-distance spotting in clear air
Practical Use Strategy
Most capable overland lighting setups use both:
- White for clear-night driving and distance visibility
- Amber for dust, snow, fog, and low-visibility conditions
This is not preference — it’s situational control.
Driving Lights vs Fog Lights: Different Tools, Different Jobs
A common mistake in lighting setups is treating all lights as interchangeable.
They are not.
Driving Lights
Driving lights are designed for:
- Long-range forward visibility
- High-speed driving conditions
- Narrow or spot beam projection
They help you see far down the trail or road.
Fog / Dust Lights
Fog lights are designed for:
- Wide, low-angle illumination
- Cutting under fog, dust, and snow reflection
- Improving near-field visibility and edge definition
They help you see what’s immediately in front of you when conditions degrade.
Using driving lights in fog or dust often reduces visibility instead of improving it.
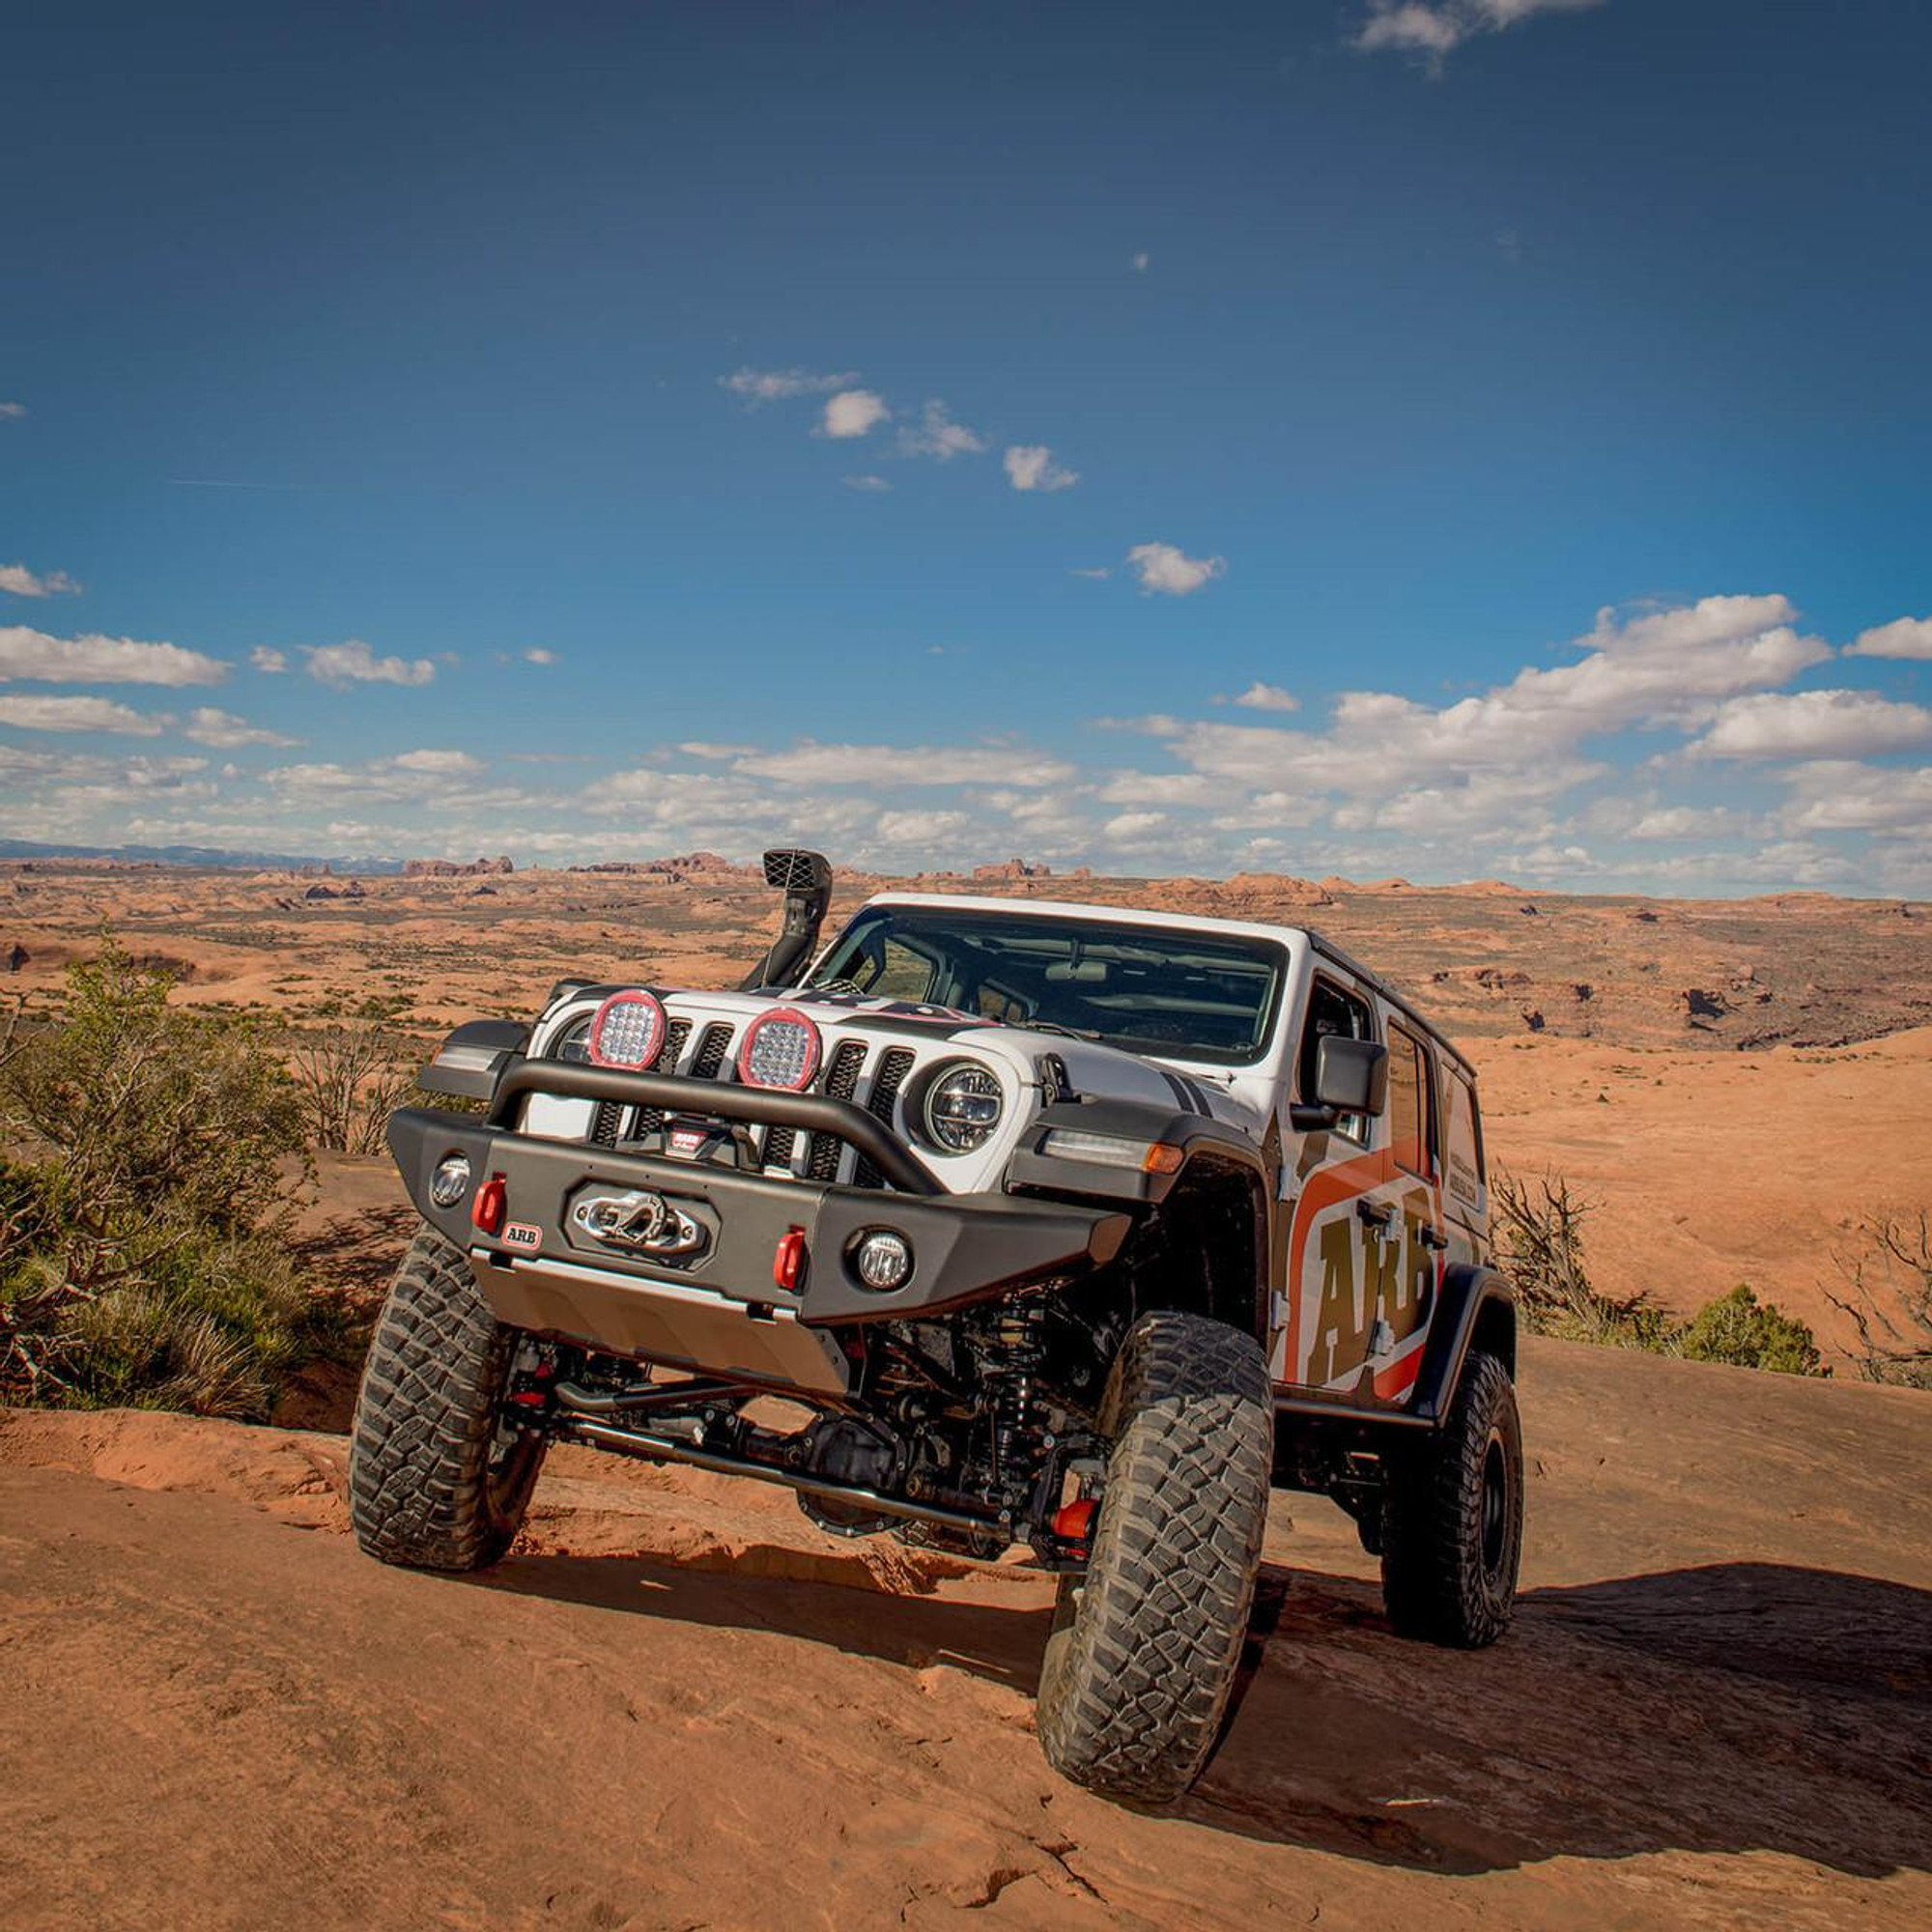
Mounting Position: Why Location Changes Performance
Where you mount lighting is just as important as the light itself.
Roof-Mounted Lights
- Excellent long-range coverage
- Wide field of view
- Can increase glare in dust or snow conditions
Best for: open terrain and clear-night travel
A-Pillar / Hood Line Lighting
- Balanced forward projection
- Reduced roof glare issues
- More controlled beam shaping
Best for: mixed trail and road use
Bumper-Mounted Lights
- Lower glare in dust and fog
- More natural line-of-sight lighting
- Better control in adverse conditions
Best for: technical trails, weather variability
Fog Lights (Low Mount)
- Cut under suspended particles
- Reduce reflection back into the driver’s eyes
- Improve close-range terrain visibility
Best for: snow, fog, dust-heavy environments
A proper lighting system is layered — not dependent on a single position.
Wiring, Switch Panels, and Installation Quality
Even the best lighting hardware fails if the electrical system is poorly designed.
Common issues in low-quality installs include:
- Undersized wiring causing voltage drop
- Poor grounding leading to flicker or dim output
- Overloaded circuits without proper relays or fusing
- Cheap switch setups that fail under vibration or weather exposure
Modern lighting systems should be treated as integrated electrical systems, not accessories.
A proper setup typically includes:
- Dedicated fused circuits per light zone
- Relay or digital switch panel integration
- Weather-sealed connectors and routing
- Clean, serviceable wiring layout
- Logical grouping of lighting functions (driving, fog, camp, work)
The goal is reliability. If you flip a switch in remote conditions, it should work every time.
The Real Goal of Vehicle Lighting
Effective lighting is not about maximum brightness.
It’s about controlled visibility.
That means:
- Matching beam type to environment
- Reducing eye fatigue over time
- Avoiding glare in low-visibility conditions
- Layering lighting systems instead of relying on one solution
- Ensuring electrical reliability under vibration and weather exposure
Good lighting makes terrain easier to read — not just easier to see.
How This Fits Into a Complete Overland Build
Lighting is not an isolated upgrade.
It ties directly into:
- Electrical system design
- Vehicle usage patterns
- Night driving capability
- Safety and recovery scenarios
In properly designed overland systems, lighting is planned alongside:
- Power systems
- Suspension load
- Storage layout
- Recovery equipment
Not added as an afterthought.
Related Topics (Internal Cluster Opportunities)
This pillar page should link to supporting articles like:
- Fog Lights vs Driving Lights: What Actually Works Off-Road
- Amber vs White Offroad Lights: When to Use Each
- Best Mounting Positions for Offroad Lighting Systems
- Why Cheap Light Bars Fail (Wiring, Heat, and Output Loss Explained)
Final Thought
Most lighting setups fail not because the lights are bad — but because the system wasn’t designed with real-world conditions in mind.
Understanding how light behaves, how it’s measured, and how it should be installed is what separates a cosmetic upgrade from a functional system.
When done correctly, lighting becomes more than an accessory.
It becomes part of how confidently your truck can operate at night, in weather, and in unpredictable terrain.
If You’re Planning a Lighting Upgrade
If you’re considering ditch lights, fog upgrades, roof lighting, or a full integrated system, the biggest difference in performance comes from planning the system as a whole — not adding lights one at a time.
Beam pattern, mounting position, wiring design, and control layout all matter just as much as the lights themselves.